Dry vegetables may sound not too appealing, right?
As one of the oldest methods of preserving food, dehydration or drying is simply removing water or moisture to prevent food from rotting and for longer shelf life. But drying is not 100% moisture-free. There is still 5 to 25 percent moisture in dried food if properly processed.
We have mentioned in a previous article, that over-abundance had led people to preserve their food so it could last until the next harvest season. This is truer for vegetables than fruits because we use vegetables in many dishes like stews, soups, salads, etc. every day.
In this article, we will guide you on how to dry vegetables using your food dehydrator. Although you could dry vegetables under the sun, sun drying may take much time than using your home kitchen appliance.
RELATED ARTICLE: 9 Ancient Food Preservation Methods We Do Today
Table of Contents
Nutritional Value of Dried Vegetables
If you’re new here or haven’t read the first part of this series, we suggest that you read the article about drying fruits. There we discussed the changes in nutritional value after the drying process.
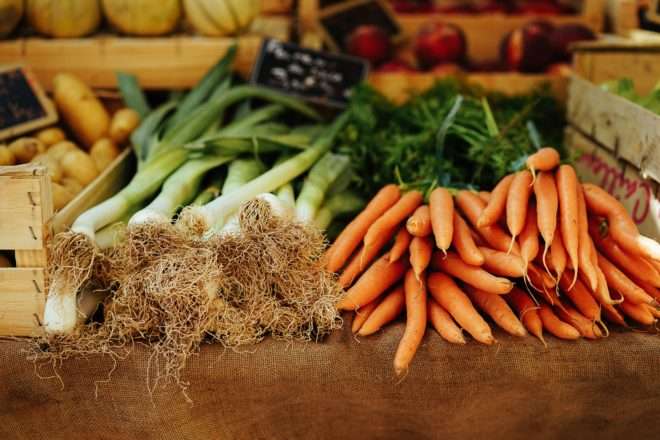
Selecting Vegetables
Unlike fruits, selecting vegetables for drying is a little bit tricky. With fruits, you can still dry slightly overripe fruits as long as they don’t have mold. But with vegetables, you have to select them at the right time when their ripeness is at its peak. For some, like corn and peas, you have to pick them just when they are about to grow ripe. This ensures that you retain their sweetness before turning those sugars into starch.
Be careful, though, when picking mushrooms because you may not be aware that you’ve picked the poisonous ones. Only the experts know how to distinguish the poisonous from the edible mushrooms. There’s no harm in asking.
Once picked or plucked out of their plant source, vegetable enzymes start to activate. Thus, it starts to change its color, flavor, texture, etc. In short, its life span starts ticking. Therefore, prepare the vegetables immediately for drying.
Wash the vegetables thoroughly to remove dirt and traces of spray. Drain them well, too. Shake leafy vegetables to remove excess water. Discard any vegetable with decay, bruises, or mold.
RELATED ARTICLE: To-ma-to or To-mah-to? It’s Still Dried Tomatoes to Me
Pretreating Vegetables
Before drying, it is important to pretreat the vegetables to prevent discoloration during drying. Unlike fruits which have several methods of pretreatment, we have two methods in pretreating vegetables.
Blanching
Blanching is dipping the vegetable in boiling water to stop the enzymatic activities that cause changes in the vegetable. It also relaxes vegetable tissues to dry faster, protects vitamins and colors, and reduces the rehydration time of vegetables before cooking.
Citric Acid Solution
Blanching in a citric acid solution helps kill harmful food bacteria such as E. coli, Salmonella species, and L. monocyte genes which may be found in vegetables. Prepare the solution by adding 1 gram (about ¼ teaspoon) of citric acid into one quart of water.
Blanching Procedure:
- Fill kettle half full with plain water or citric acid solution and bring to boil.
- Put the prepared vegetables in a cheesecloth or mesh bag.
- Drop the vegetable bags in boiling water and start timing. Make sure that the vegetable is covered with water. Shake the bag so that water reaches all pieces. Refer to the table below for blanching time.
- Remove the vegetable bag and immediately transfer it to a bowl of ice-cold water to stop it from cooking.
- Drain well or dry on a paper towel before arranging them on drying trays.
RELATED ARTICLE: The Beginners’ Guide to Home Food Dehydration
How to Dry Vegetables
As always, preparing on how to dry vegetables is important. Arrange the prepared vegetables on drying trays in a single layer and not overlapping each other to ensure even drying.
Using a Food Dehydrator
We discussed before that there are two types of food dehydrators. The vertical airflow type and the horizontal airflow type. Whatever you have, the thing that is important in drying vegetables is the thermostat so you could control the heat settings. If your dehydrator’s fan is located at the bottom, it is better to rotate your trays for even drying.
Don’t worry if you don’t have a food dehydrator at the moment. You may use a gas or electric oven for drying vegetables. But be watchful and careful not to scorch the prepared vegetable. The keys to oven drying are proper temperature and ventilation.
Here are our recommended food dehydrators for you to check out.
Set the thermostat of the food dehydrator to 140° to 150°F. Ensure that your vegetables are evenly spaced apart. It is crucial that the air can pass through the trays and in between the vegetables. Remember to check the temperature and maintain it at 140°F. Rotate the trays from time to time as well to ensure even drying. Take note that food scorches easily at the end of drying time, so better turn off the heat at this point and open the oven door wide for an hour or so.
| VEGETABLE | PREPARATION | BLANCH | DRY | TEST FOR DRYNESS |
| Asparagus | Wash thoroughly. Cut large tips into halves. | 4-5 mins | 6-10 hrs | Leathery to brittle |
| Beans, green | Wash and cut into pieces or strips | 4 mins | 8-14 hrs | Very dry, brittle |
| Beets | Cook, cool, and peel. Cut into ⅛” thick strips | None | 10-12 hrs | Brittle, dark red |
| Broccoli | Wash, trim, and cut into serving pieces | 4 mins | 12-15 hrs | Crisp, brittle |
| Brussels sprouts | Wash and cut into half lengthwise | 5-6 mins | 12-18 hrs | Tough to brittle |
| Cabbage | Wash, remove outer leaves, quarter and core. Cut into ⅛” thick strips | 4 mins | 10-12 hrs | Crisp, brittle |
| Carrots, parsnips | Wash, cut off roots, tops, and peel. Cut into ⅛” slices or strips. | 4 mins | 6-10 hrs | Tough to brittle |
| Cauliflower | Wash, trim and cut into small pieces | 4-5 mins | 12-15 hrs | Tough to brittle |
| Celery | Trim stalks first. Wash stalks and leaves thoroughly. Cut stalks into pieces | 4 mins | 10-16 hrs | Very brittle |
| Chili peppers, green | Wash. Slit skin and rotate over a flame for 6-8 mins or scald in boiling water to loosen skin. Peel and split pods. Remove seeds and stem. Wear gloves for your protection. | None | 12-24 hrs | Crisp, brittle, medium green |
| Chili peppers, red | Wash. Slice or leave whole if small | 4 mins | 12-24 hrs | Shrunken, dark red pods, flexible |
| Corn | Remove husk, trim, and wash well. Blanch until milk in corn is set. Cut kernels from the cob | 4-6 mins | 6-10 hrs | Crisp, brittle |
| Eggplant | Wash, trim, cut into ¼” slices | 4 mins | 12-14 hrs | Leathery to brittle |
| Horseradish | Wash, remove rootlets and stubs, Peel and scrape roots. Grate | None | 6-10 hrs | Brittle, powdery |
| Mushrooms | Scrub. Discard tough, woody stalks. Slice tender stalks into ¼” thick. Peel large mushrooms. Leave small mushrooms whole. Dip in a solution of 1 tsp. citric acid/quart water 10 minutes. Drain. | None | 8-12 hrs | Dry and leathery |
| Okra | Wash thoroughly. Cut into ½” thick pieces or lengthwise | 4 mins | 8-10 hrs | Tough, brittle |
| Onions | Wash and remove outer paper-like skin. Remove tops and root ends. Slice into ⅛” to ¼” thick. | 4 mins | 6-10 hrs | Very brittle |
| Parsley, other herbs | Wash thoroughly and separate clusters. Discard long or tough stems. | 4 mins | 4-6 hrs | flaky |
| Peas | Shell and wash thoroughly | 4 mins | 8-10 hrs | Hard, wrinkled, green |
| Peppers, pimientos | Wash, stem, remove core and seeds. Cut into ¼” to ½” strips or rings | 4 mins | 8-12 | Tough to brittle |
| Potatoes | Wash and peel. Cut into ¼” strips or ⅛” thick slices. | 7 mins | 6-10 hrs | Brittle |
| Spinach, Kale, Chard, Mustard | Trim and wash thoroughly. Shake or pat dry to remove excess water. | 4 mins | 6-10 hrs | Crispy |
| Squash, summer or banana | Wash, trim, cut into ¼” slices. | 4 mins | 10-16 hrs | Leathery to brittle |
| Squash, winter | Wash rind. Cut into pieces. Remove seeds and cavity pulp. Cut into 1” wide strips. Peel rind. Cut strips crosswise into pieces about ⅛” thick. | 4 mins | 10-16 hrs | Tough to brittle |
| Tomatoes | Steam or dip in boiling water to loosen skins. Chill in cold water. Peel. Slice 1/2” thick or cut in 3/4” sections. Dip in a solution of 1 tsp. citric acid/quart water for 10 minutes. | None | 6-24 hrs | Crispy |
Conditioning
Usually, when drying is done, moisture among pieces are not equal. That’s the reason why conditioning, or the distribution of residual moisture in dried food, is performed. Dried fruits are usually conditioned after drying. But for vegetables, since they dry almost waterless, conditioning is not always necessary.
Drying Herbs
Drying herbs is very simple. Expose the leaves, flowers, or seeds to warm, dry air and you’re done. Sun drying is not recommended, though, as it will lose its color and flavor.
Pick the herbs for drying when their flowers just open. Gather them in the early morning after the dew has evaporated to avoid wilting. Avoid bruising the leaves. Do not let it lie under the sun unattended. Rinse the herbs in cool water and gently shake excess water. Discard bruised, soiled, or imperfect leaves and stems.
Pre-heat your food dehydrator at 95°F to 115°F. If you live in a high-humidity area, you may increase it to 125°F. Place the prepared herbs in a single layer on drying trays. Drying times vary from 1 to 4 hours so check periodically. Once they crumble or stems break when bent, they’re dry. You may also refer to your dehydrator instructional manual for specific details if needed.
Rosemary, sage, thyme, summer savory, and parsley can be dried without a dehydrator. Just tie them into small bundles and hang them to air dry. Air drying indoors is much better to preserve color and flavor.
Basil, oregano, tarragon, lemon balm, and the mints have high moisture content and will mold if not dried quickly and properly. Hang them inside paper bags to dry. Tear or punch holes on the sides of the bag and suspend a small bunch of herbs and seal the top with a rubber band. Don’t attempt to suspend a large bunch of herb as they will mold. Place the bag in a well-ventilated area to air dry. Any seeds or leaves that may fall off will be caught at the bottom of the bag.
Mint, sage, and bay leaf can also be dried separately. Remove the best leaves from the stems. Lay the leaves on a paper towel on a single layer, without allowing leaves to touch. Cover with another towel and layer of leaves. You can stack them up to five layers and dry them in a very cool oven. The oven or pilot light of the oven gives enough heat for overnight drying. The leaves will dry flat and still retain their color.
A microwave oven can be used to dry herbs only in small quantities. Just follow the directions from the instructional manual.
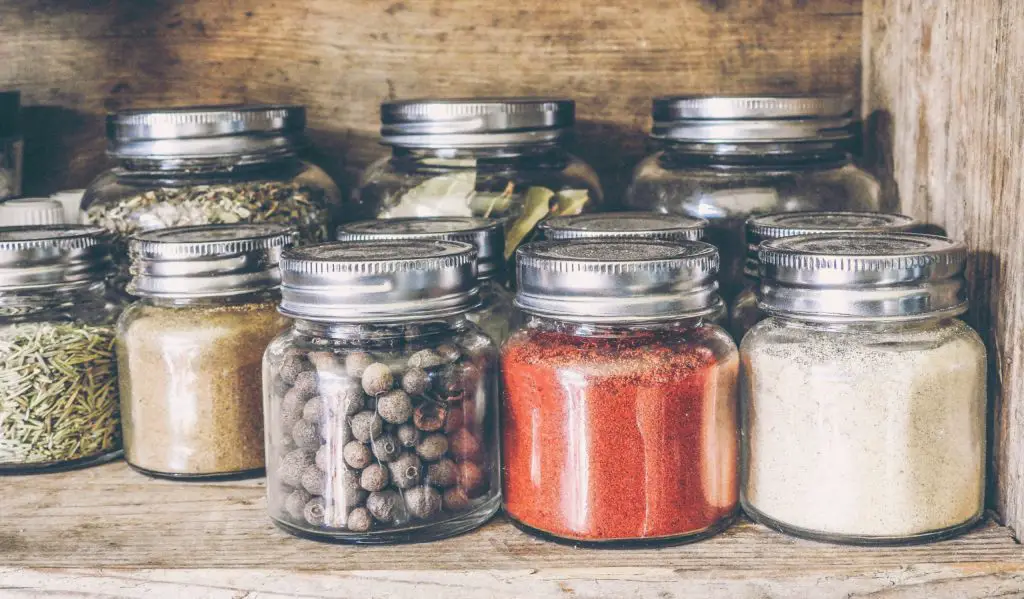
If leaves become crispy or crumble easily between the fingers, the herbs are ready to be packed and stored. Dried leaves may be left whole or crumpled before storage. Rub the seeds between the hands and blow away the chaff to separate. Place herbs in airtight containers and store them in a cool, dry, dark place to protect color and aroma.
Dried herbs are thrice stronger than fresh herbs. To use as a substitute for fresh herbs, use ¼ to ⅓ of the amount in the recipe.
RELATED ARTICLE: A Beginner’s Guide on How to Dry Herbs
Final Thoughts
Success in drying vegetable depends on three things:
- The amount of heat that draws out moisture without cooking the vegetable;
- The dry air that absorbs moisture; and
- The sufficient airflow that carries the moisture away.
If the temperature is too low, a microorganism may survive or grow before the food is dried. If the temperature is too high and the humidity is too low, the vegetable may harden on the surface and may not dry properly.
Drying vegetables is not an exact science despite being a simple method of food preservation. It is still the trial and error approach that works at home and is needed when deciding to dry vegetables.